
Take a screenshot for something static; record the screen for motion; label the area to show what you mean
VOICEVoice-driven production.CAPTUREScreen, screen recording, scrolling capture or clipboard signal.ANNOTATIONMark, number, box or arrow tied to a speech moment.TASK-DEFINITIONThe task packet handed to an agent.
The label does not have to be a component — it can be any region on the screen.
Start recording and capture the screen without stopping your speech. Use Option+S to attach a static visual to the conversation. Use Option+Shift+S when you want to mark on the visual; in this flow, Shift means “I am going to interact with this,” and it opens the annotation editor.
On first use the editor opens with the rectangle tool; if you selected another tool before, that last choice may be preserved. If rectangle is not active, press R or choose the rectangle in the toolbar. Then draw while you speak: say “the cloud icon is here,” “these two belong to the same family,” or simply “this part.”
You do not have to say “number one, number two”; saying it is more stable. The drawing time is tied to the conversation while you speak, so the AI can see which mark belongs to which words. Speech, visual capture and annotation happen together instead of making you stop and write a separate explanation list.
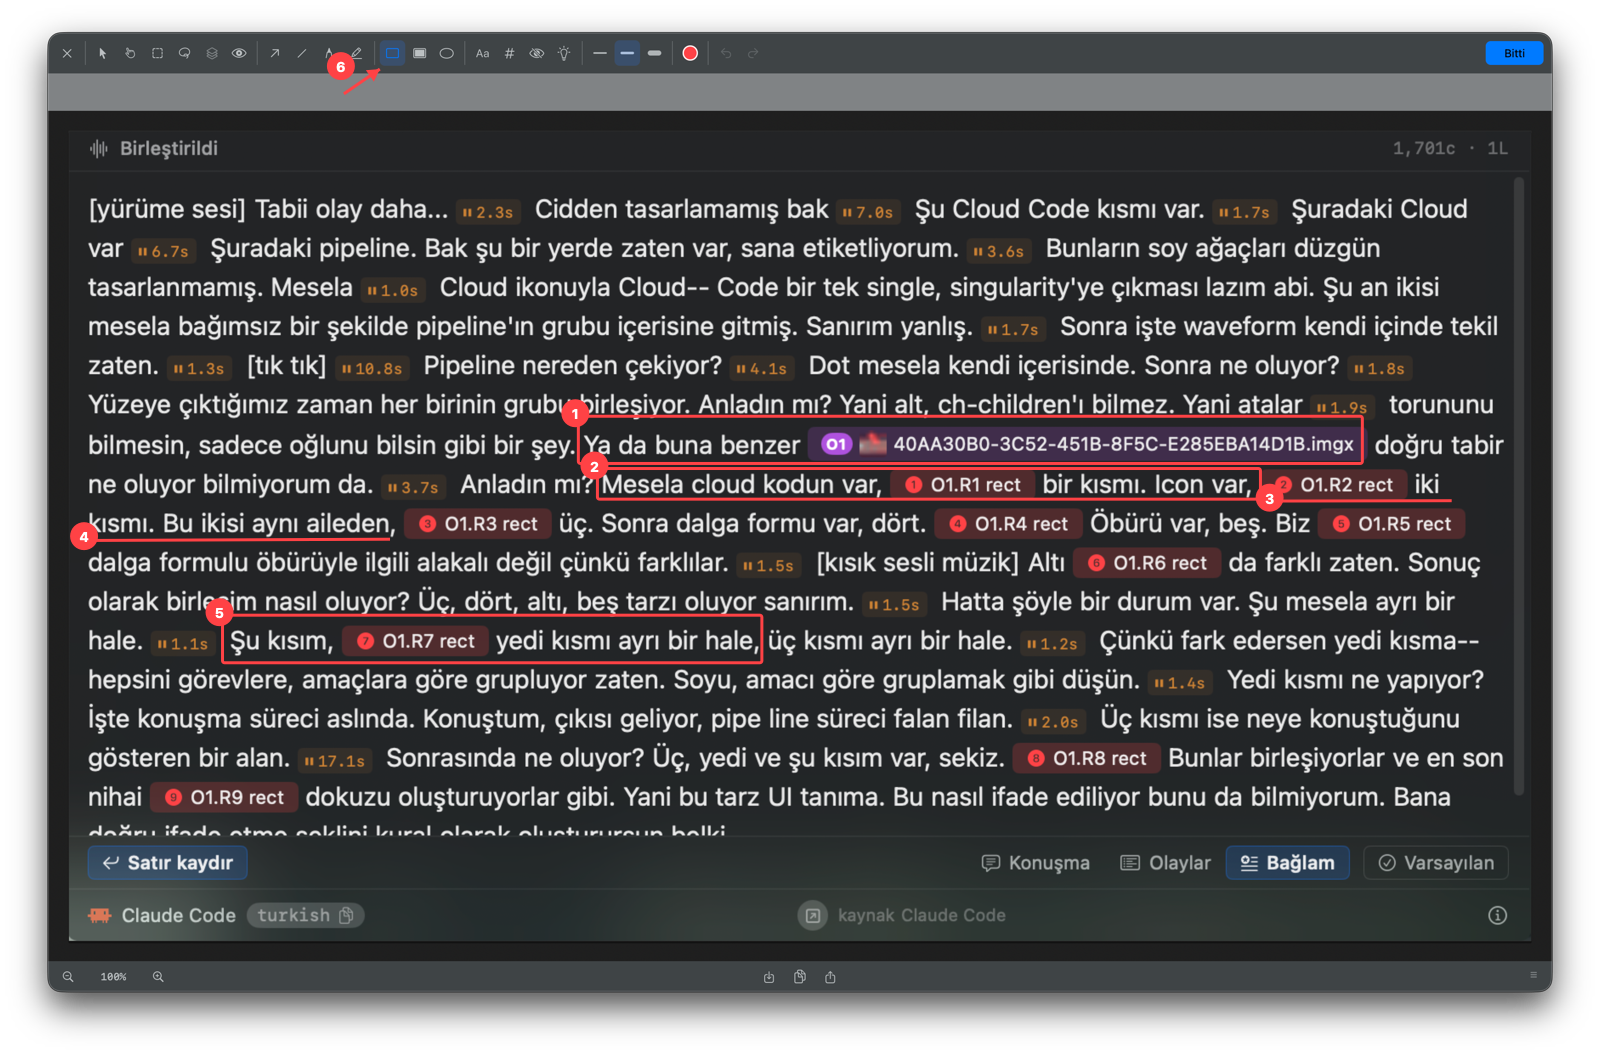
- 1Visual reference — the screenshot attached when the speaker says “something like this”
- 2First mark — the area drawn while referring to the cloud code
- 3Second mark — another area inside the same conversation
- 4Relation — the mark drawn while saying “these two belong to the same family”
- 5“This part” — the region shown while speaking
- 6Rectangle tool — the active drawing tool in the toolbar; `R` selects it too
Use a screen recording for moving things. You can annotate a screen recording after recording it; I do not really recommend it. If you do, put the mark only on the first frame so the agent sees where to focus. A screen recording carries the behavior from start to finish directly, so it does not need a separate 1/2/3 index explanation.
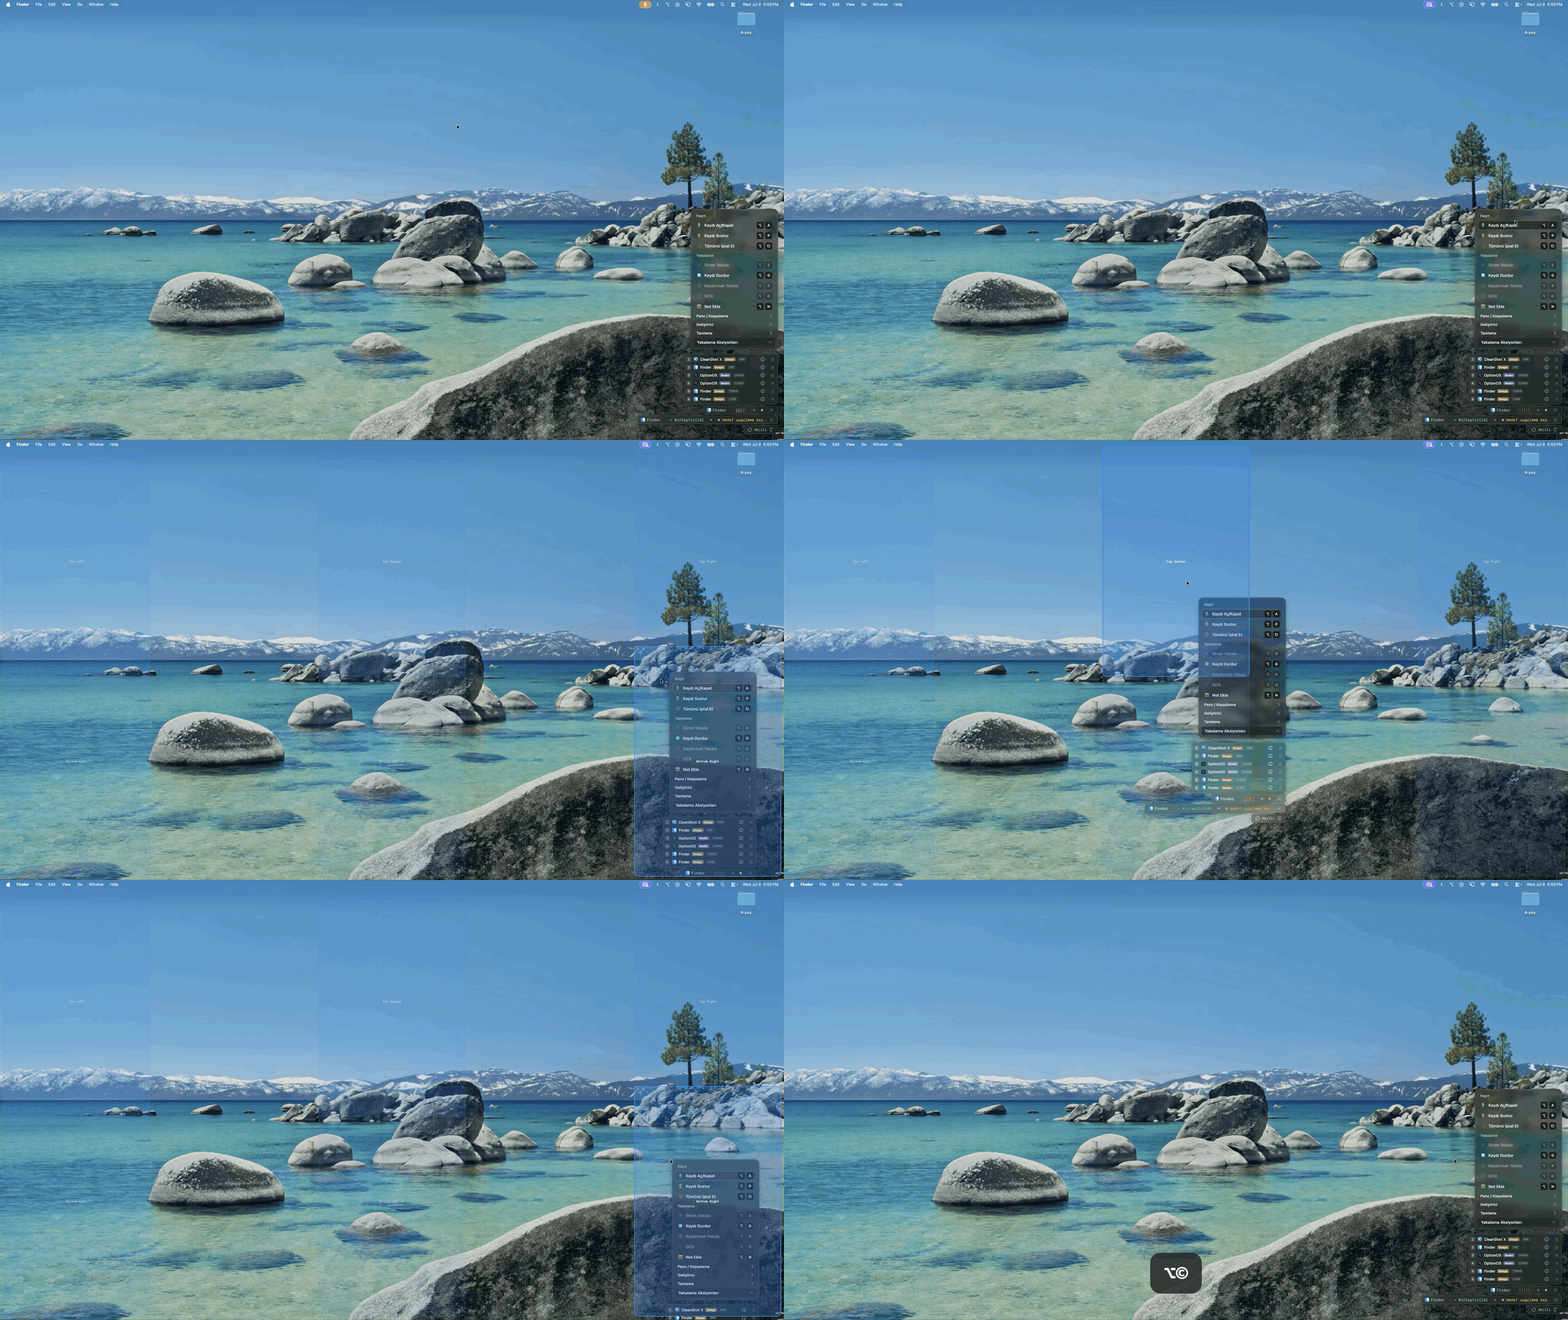
For long web pages, scrolling capture is the same logic: capture by scrolling, then annotate on top.
You can also label an image you drew on earlier. If something comes to mind about the first image later, click the image and edit it; your speech keeps going to the AI, so the flow does not break and the AI understands it.
The packet that reaches the agent is collected with this lineage tree:
Task packet
├─ speech
├─ captured visual
│  ├─ screenshot
│  ├─ ekran kaydı
│  └─ scrolling capture
├─ mark
│  ├─ rectangle
│  ├─ number
│  └─ label
├─ app context
│  ├─ which app it started in
│  └─ what landed in the capture list
└─ packet that reaches the agent
└─ "this part" is shown, not guessedIf you are explaining a component or UI piece, use Component Copy. It is an approach that shows what is behind the code: the source code and relations travel with the image — precise, direct context.
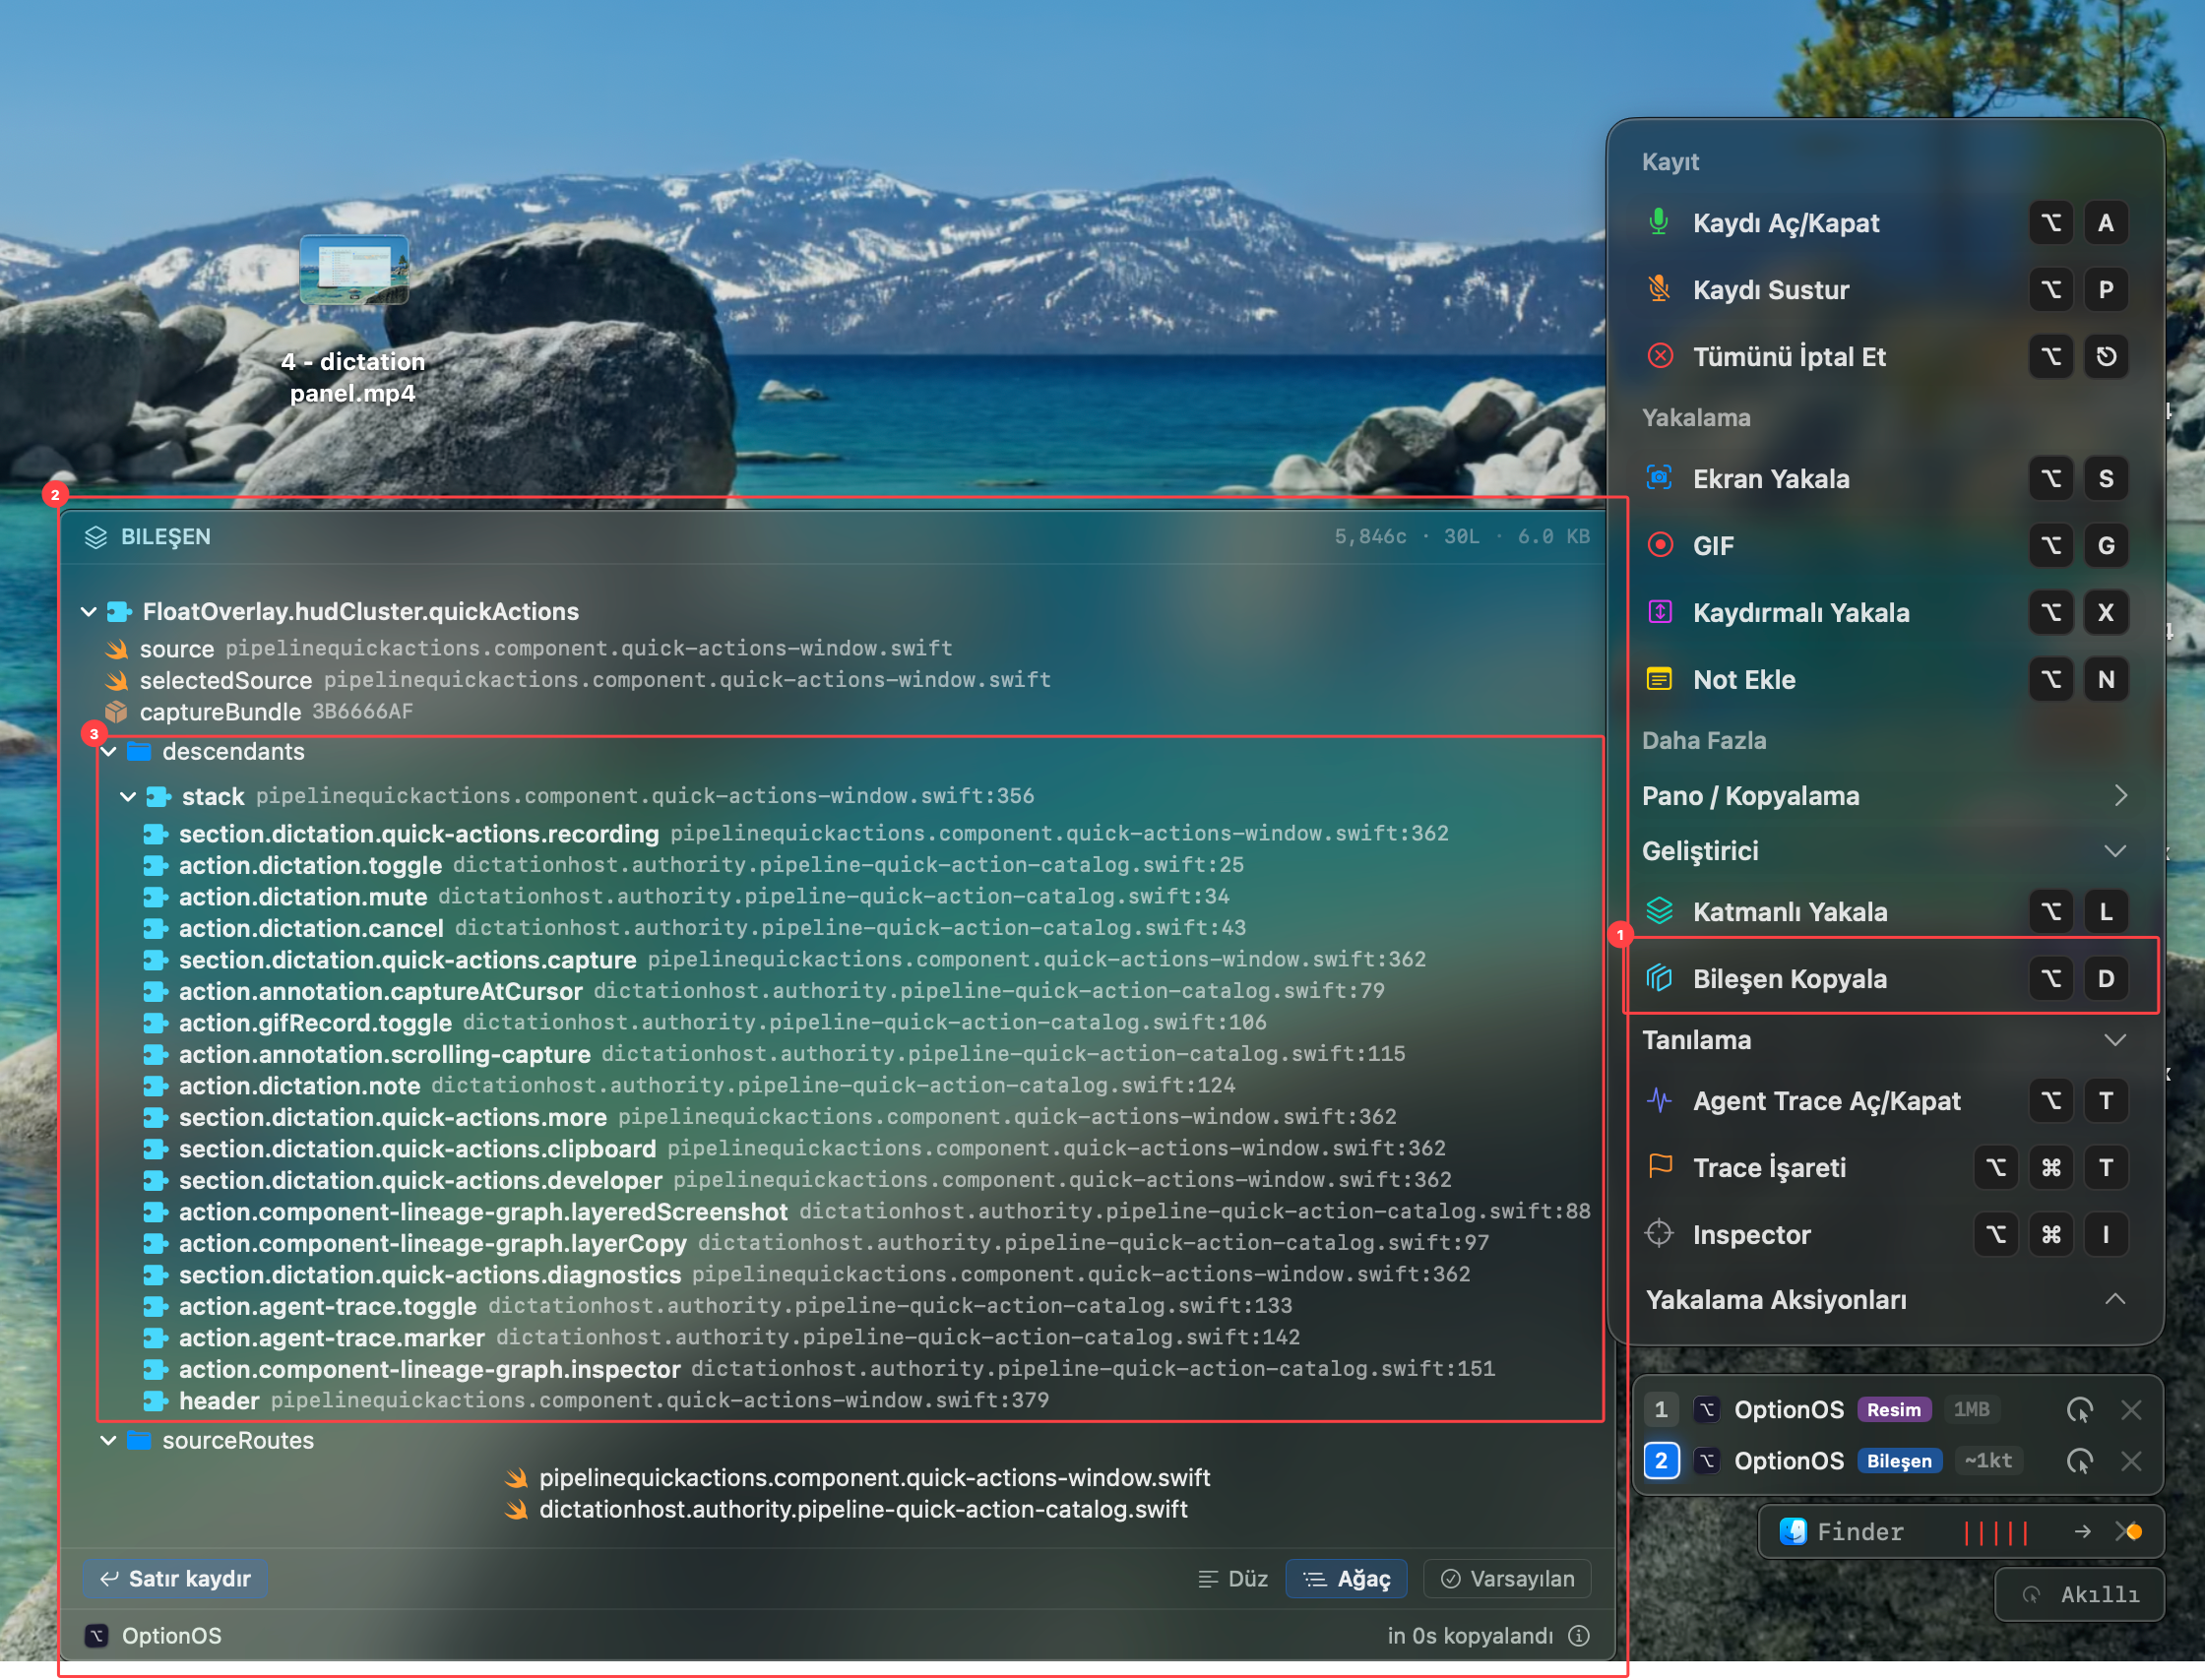
- 1Component Copy action
- 2Copied component packet
- 3Component/source descendants tree