
Give AI not only what you said, but also what you saw and which part you meant
WORKFLOWRepeatable working flow.VOICEVoice-driven production.AI-DEVELOPMENTAI development practice.
The idea is simple: do not try to describe the code first; show what you see, speak what you want, and hand the context to the agent without losing the thread. optionOS connects speech, capture, annotation, lineage and agent control into one development journey.
For someone new to the system, the journey starts like this: keep the working screen visible, capture the exact piece on that screen, mark it with numbers or boxes, speak the desired change, and let the agent use that packet to find the right component in code.
So the product should not be read as one isolated feature. Dictation carries intent; Capture and Annotation mark what the user sees; Lineage Graphs connect that mark to a component or source path; Cockpit controls the agents doing the work.
The ecosystem view matters for that reason: the Dictation capture list, Clipboard/Pano surface, Mac Cockpit grid and VS Code Cockpit panel can stay visible at the same time. The user does not rebuild context by hand across tools; speech, copied signals, visuals and agent state stay in one working layout.
From Apple to optionOS: a Settings design captured in a 5-minute conversation. I do not start by writing code or a long prompt. I keep the Apple Settings reference visible, compare it with the optionOS Settings Shell I am designing, and collect the screen, video and images through the capture actions on the right. Then I label the whole thing by speaking; it becomes one packet for AI.
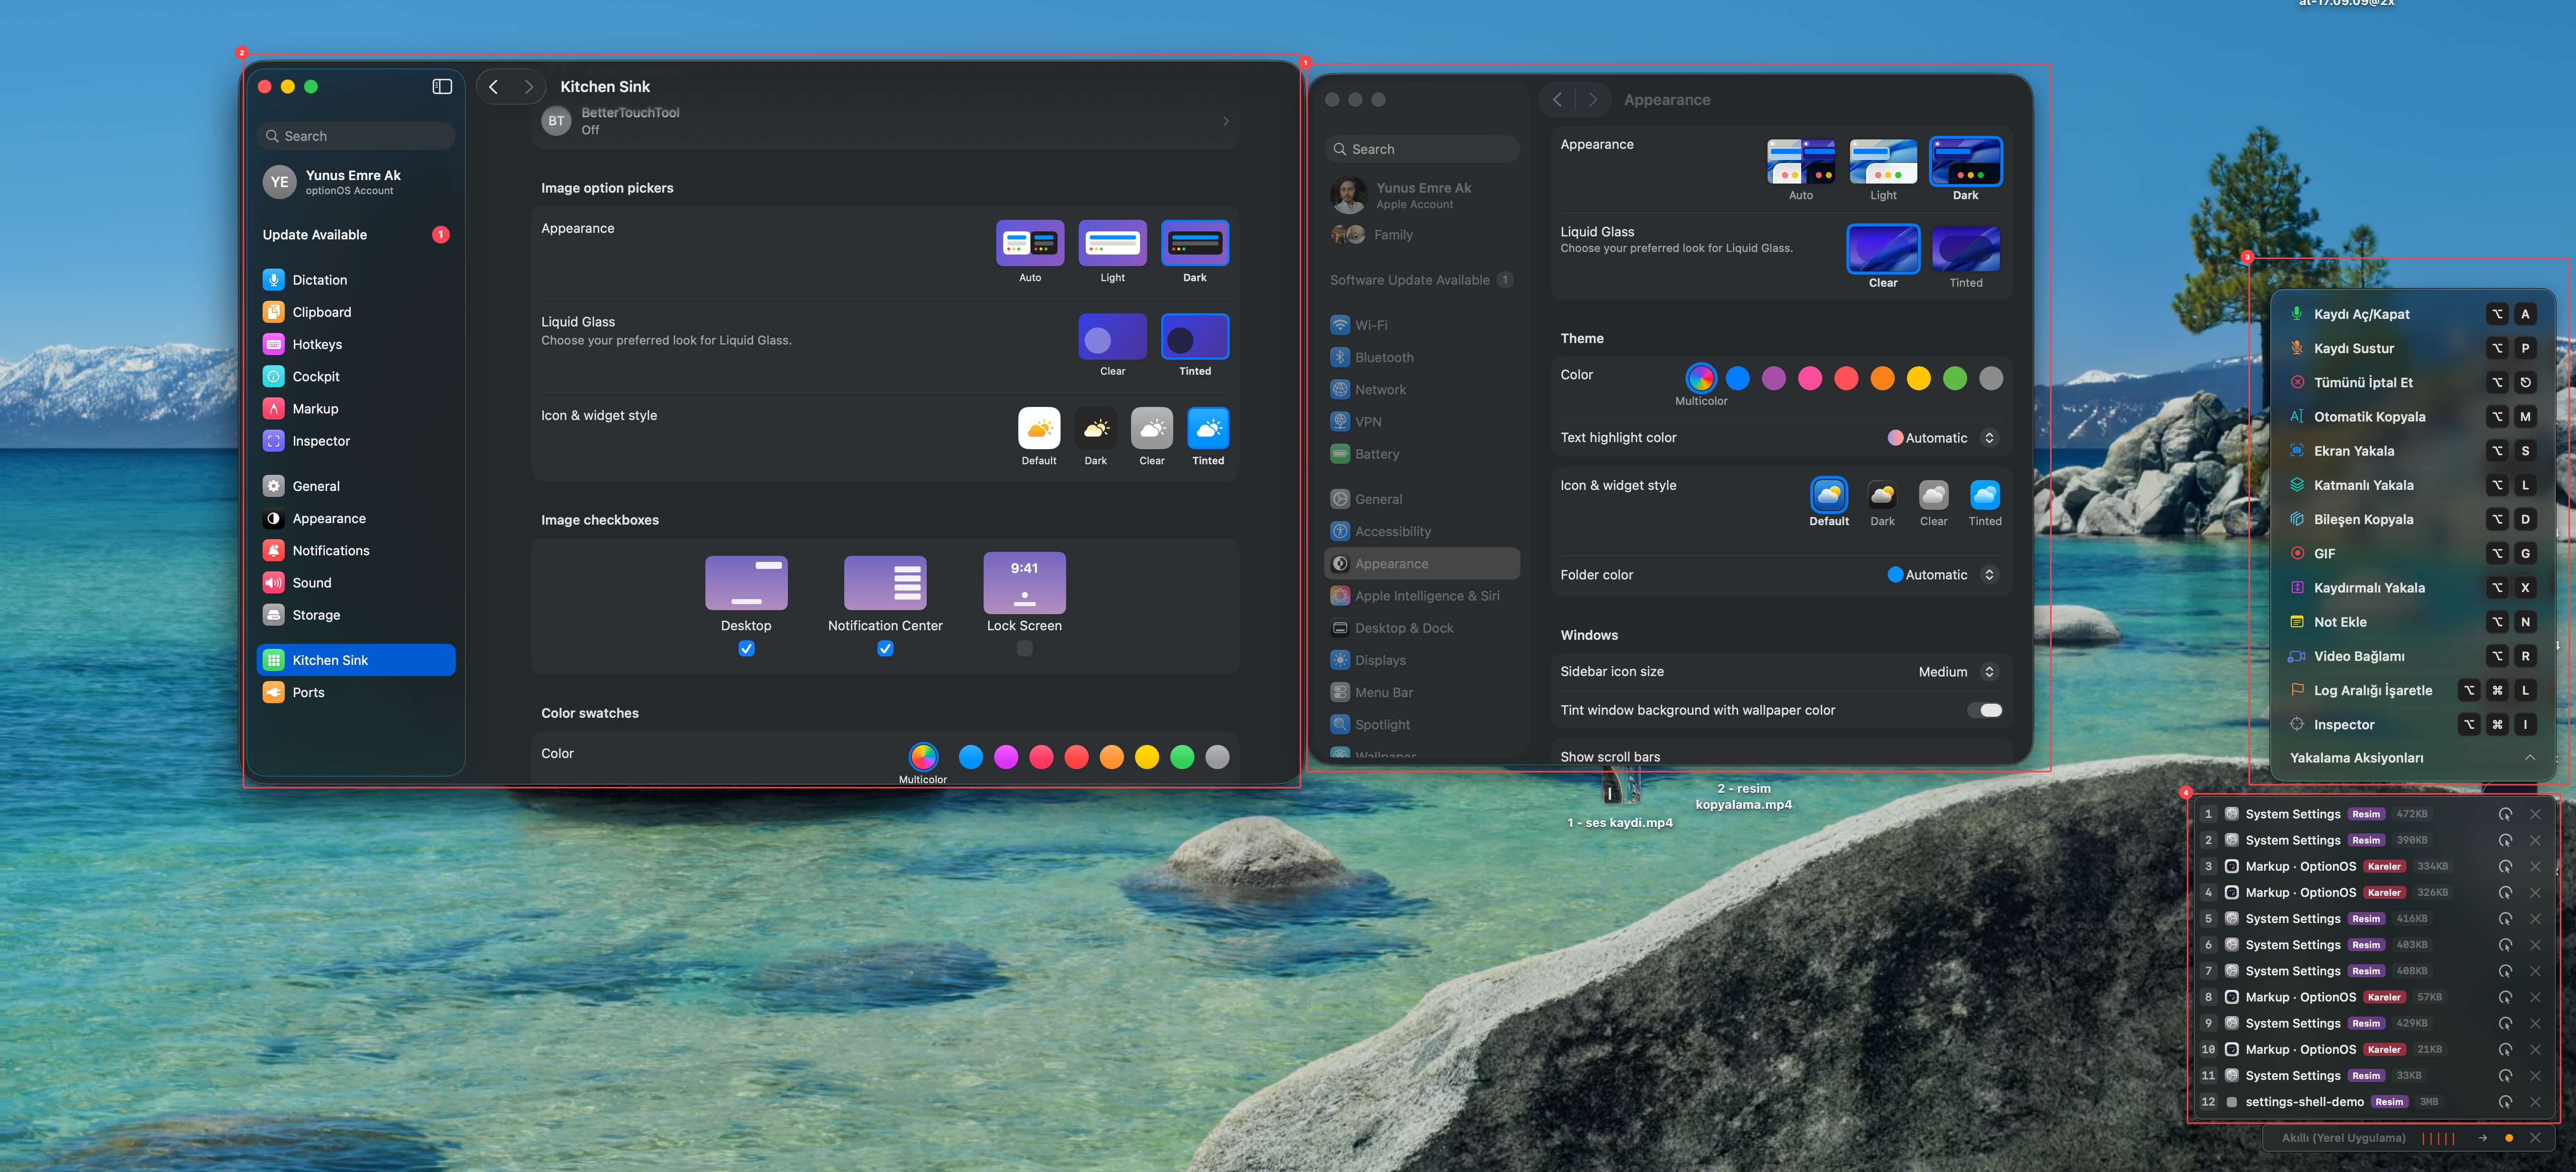
- 1Apple System Settings — the reference surface I liked
- 2optionOS Settings Shell — the design counterpart being built
- 3Capture Actions — recording, screen capture, screen recording, note and video binding
- 4Captured images/videos — the evidence packet labelled during speech
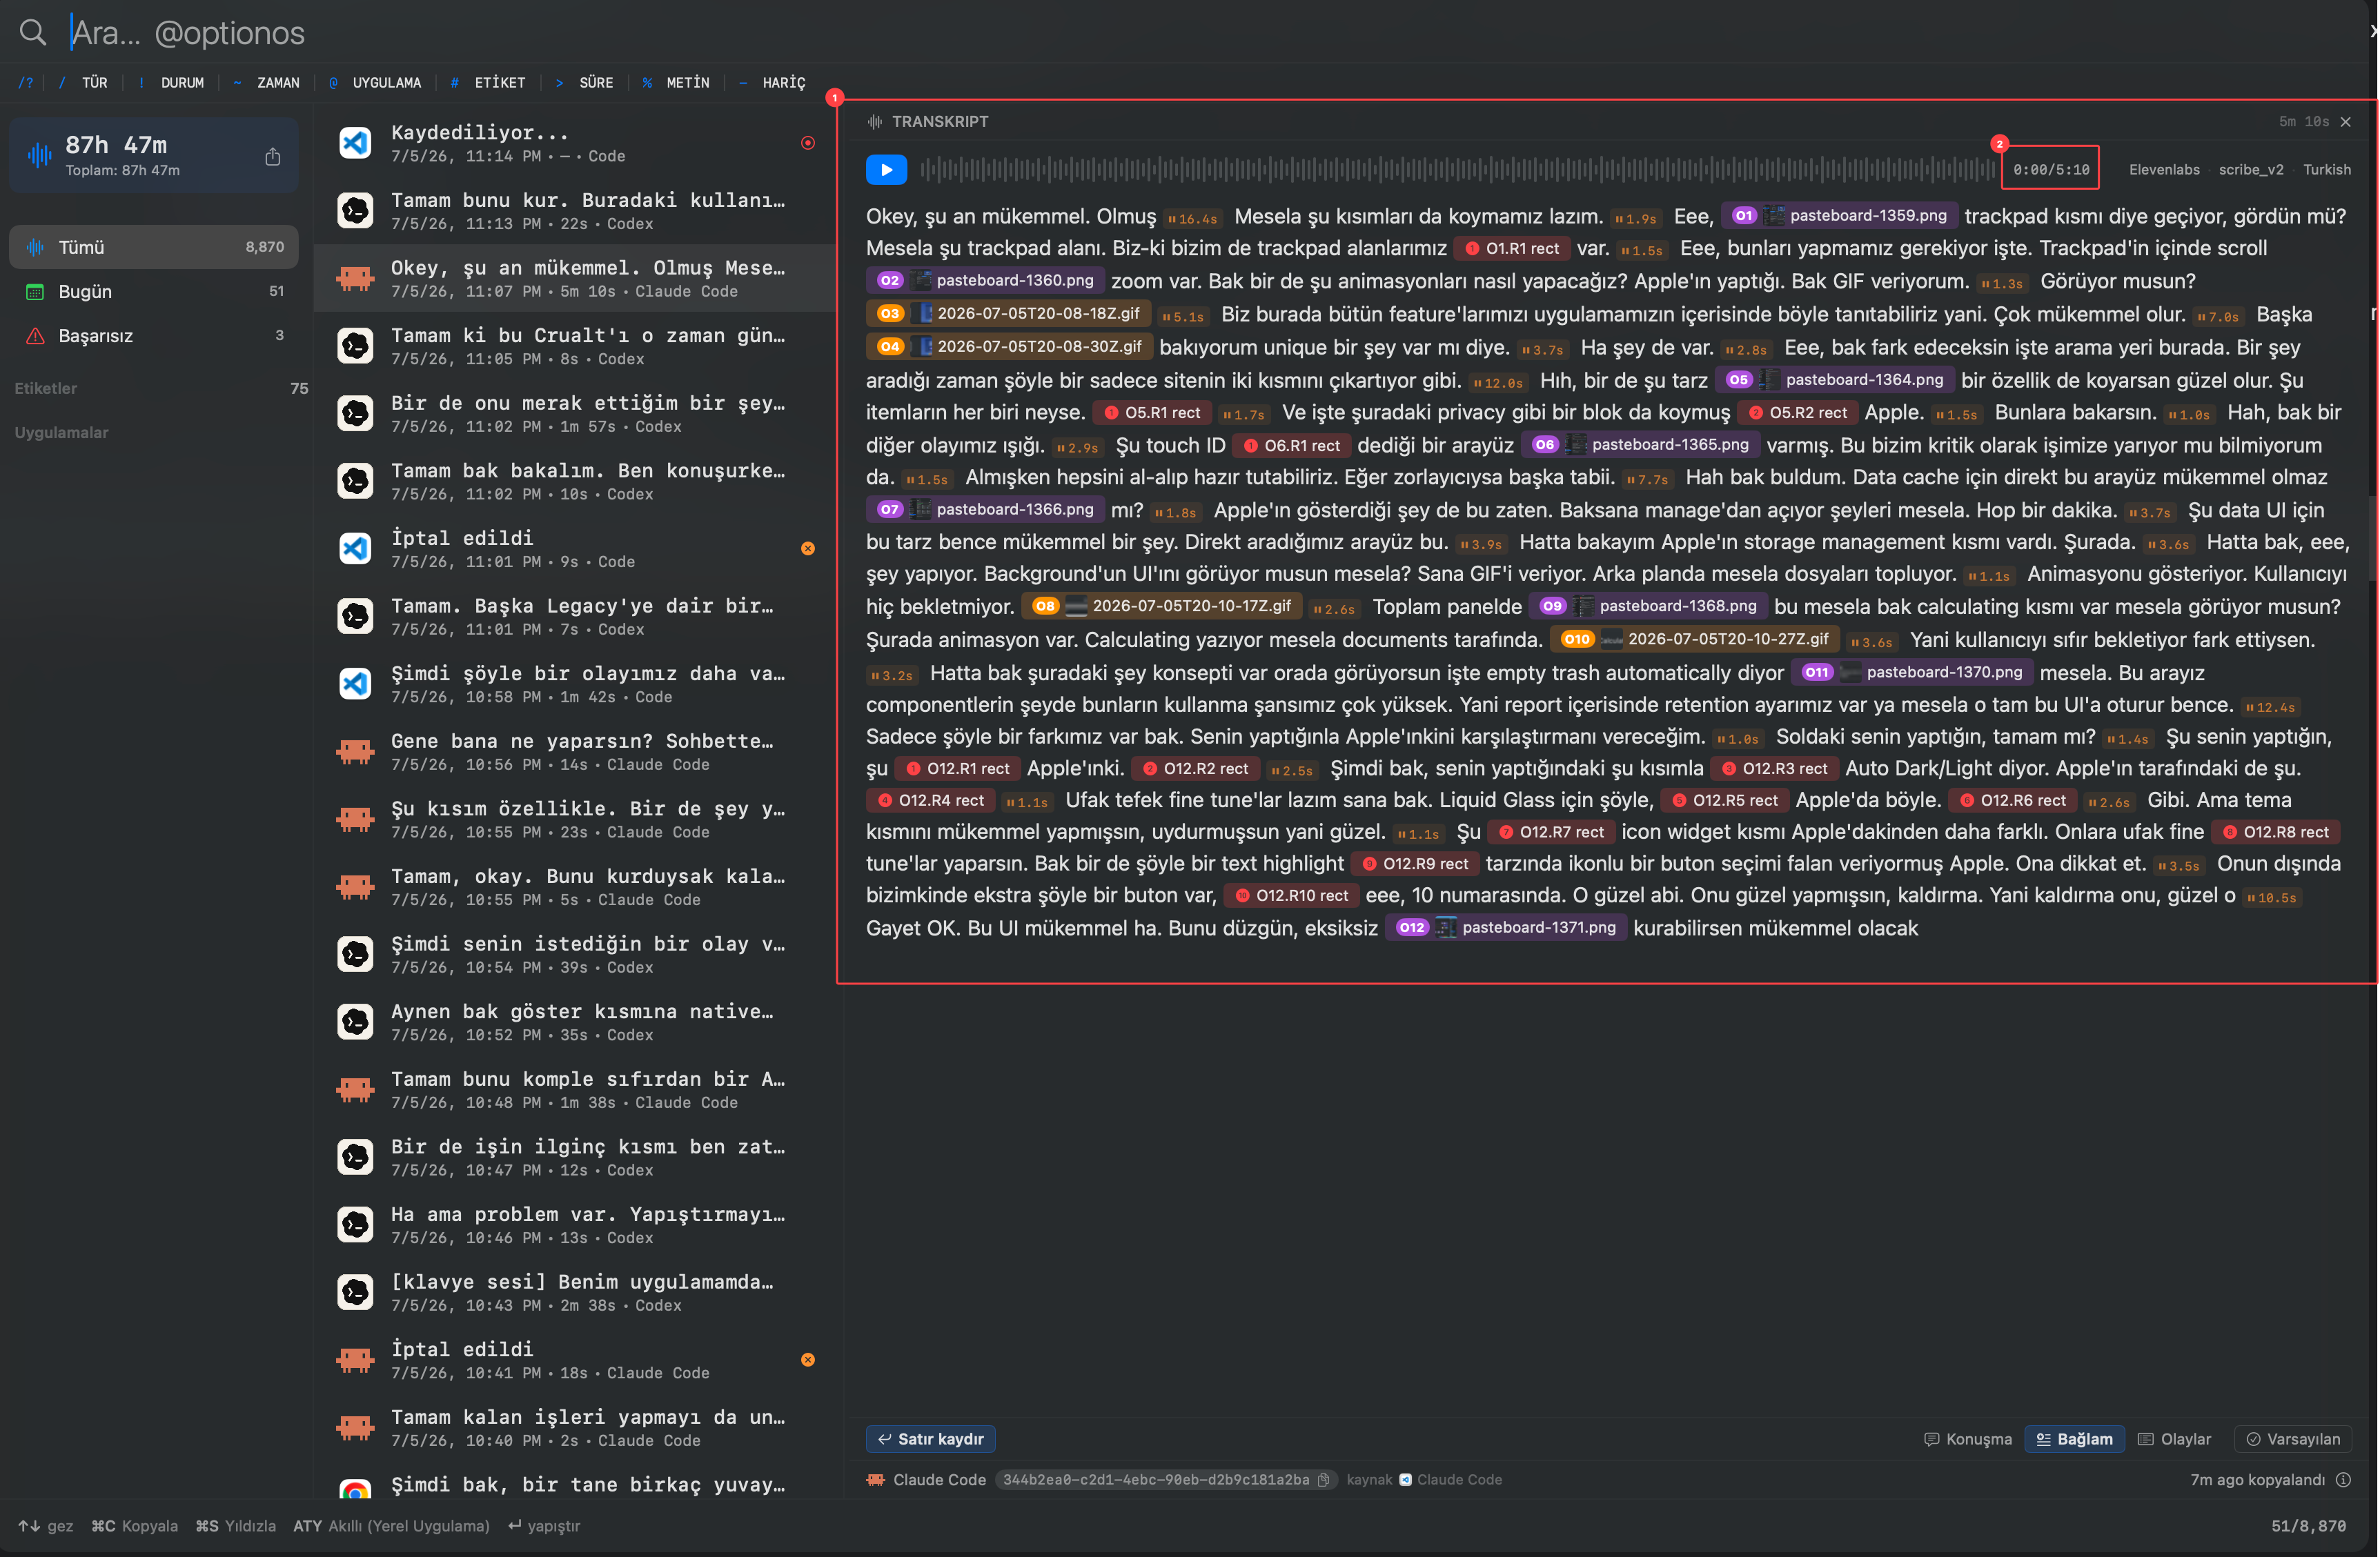
- 1Transcript — Apple references, visual tokens and spoken context
- 25:10 duration — a design brief that would normally take much longer is captured by speech
The reader should leave this example with one answer: in optionOS I do not give AI only what I said; I also give it what I saw, which part I marked and which reference I liked.
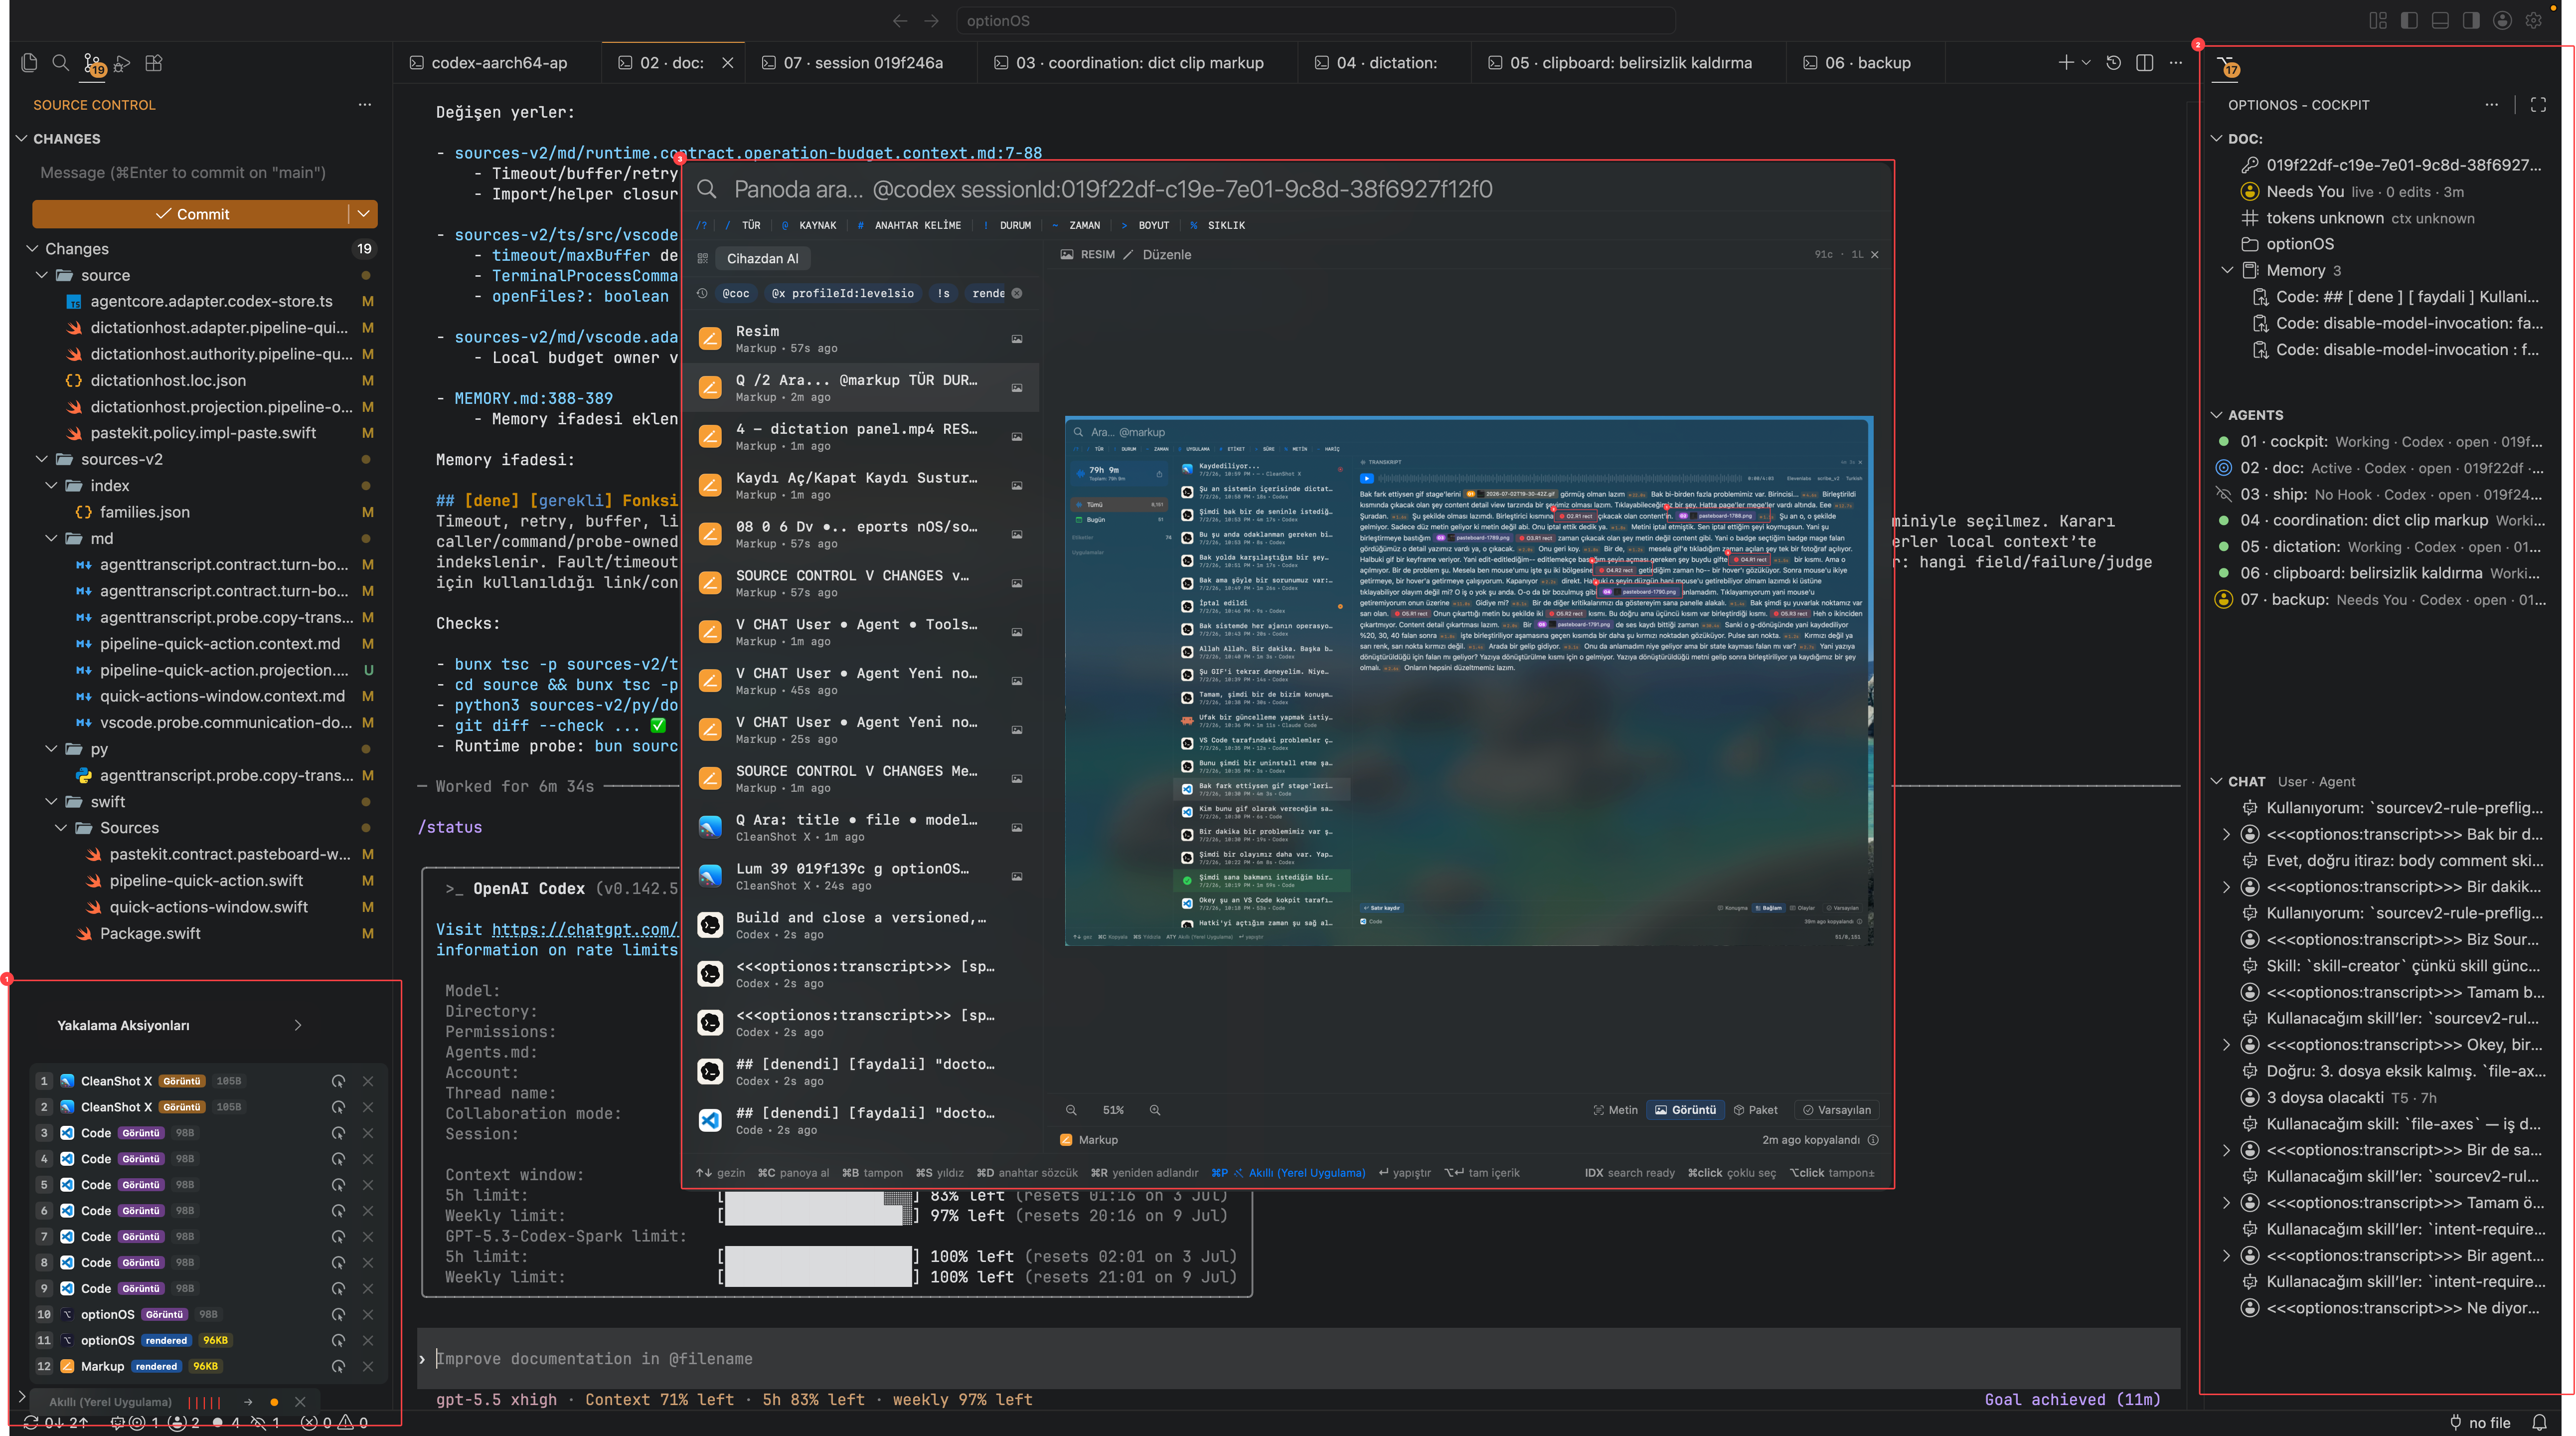
- 1Dictation and capture actions
- 2VS Code Cockpit panel
- 3Clipboard/Pano working surface
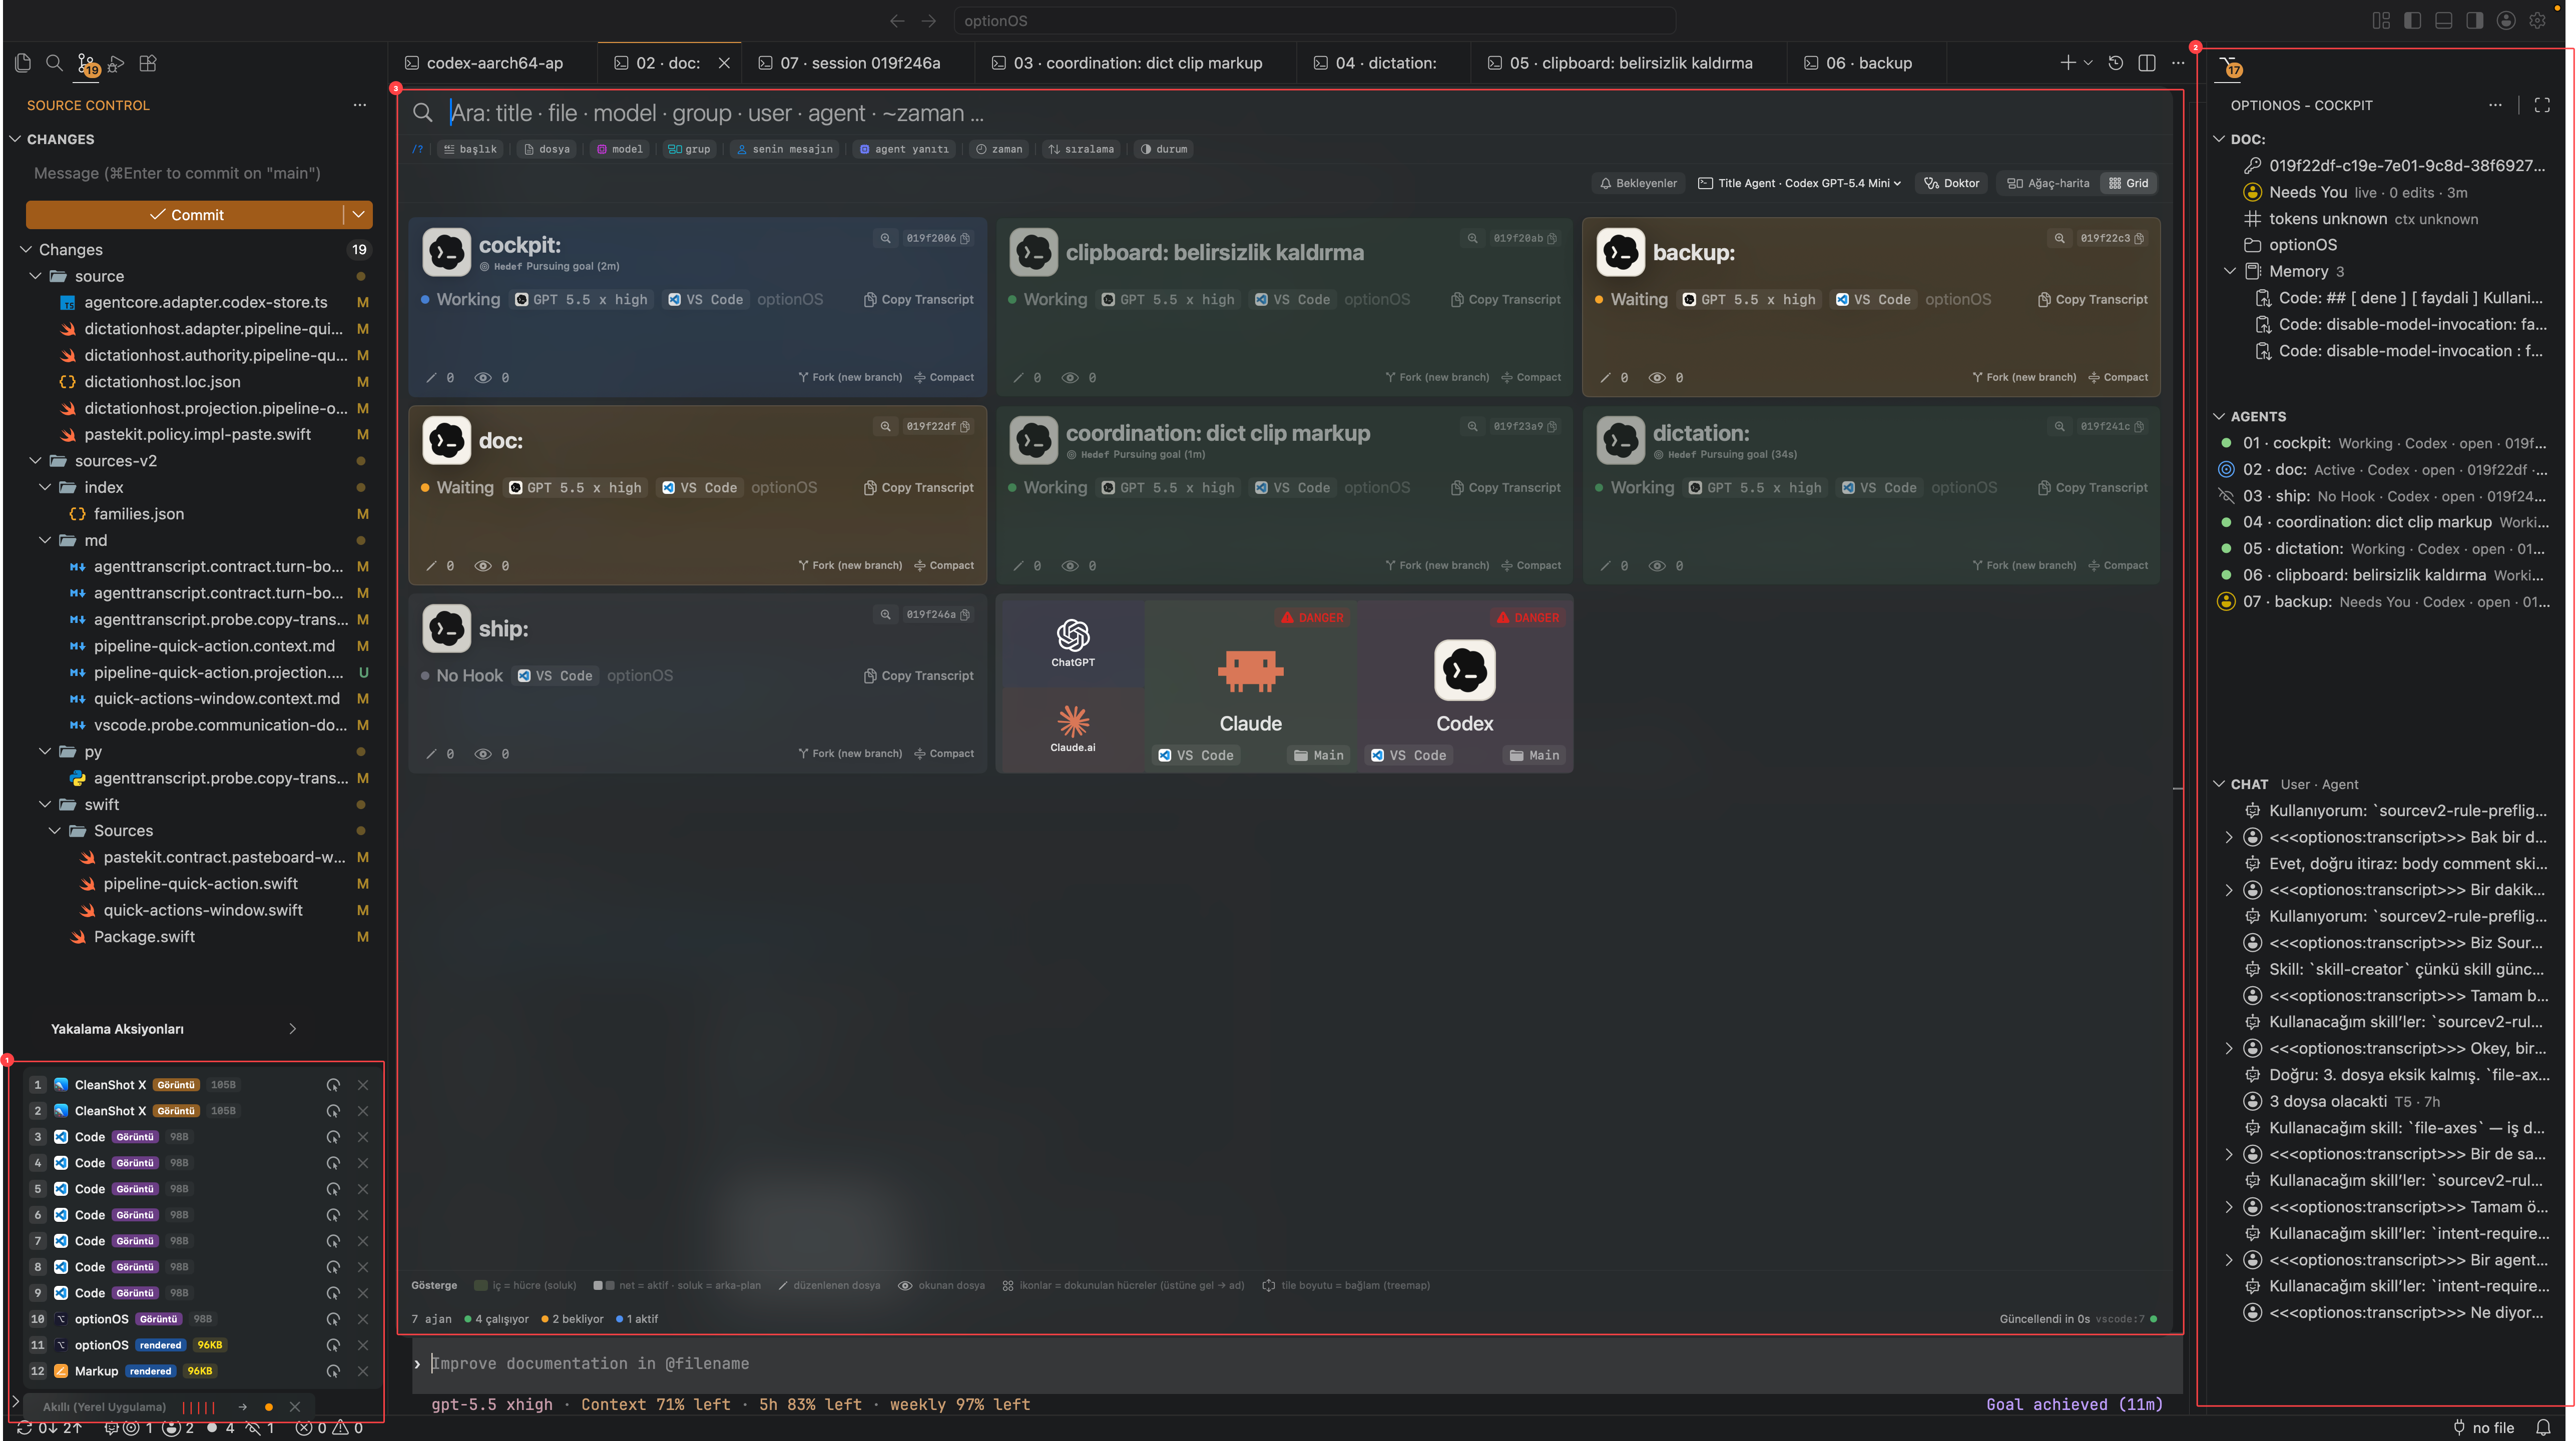
- 1Dictation capture list
- 2VS Code Cockpit panel
- 3Mac Cockpit agent grid
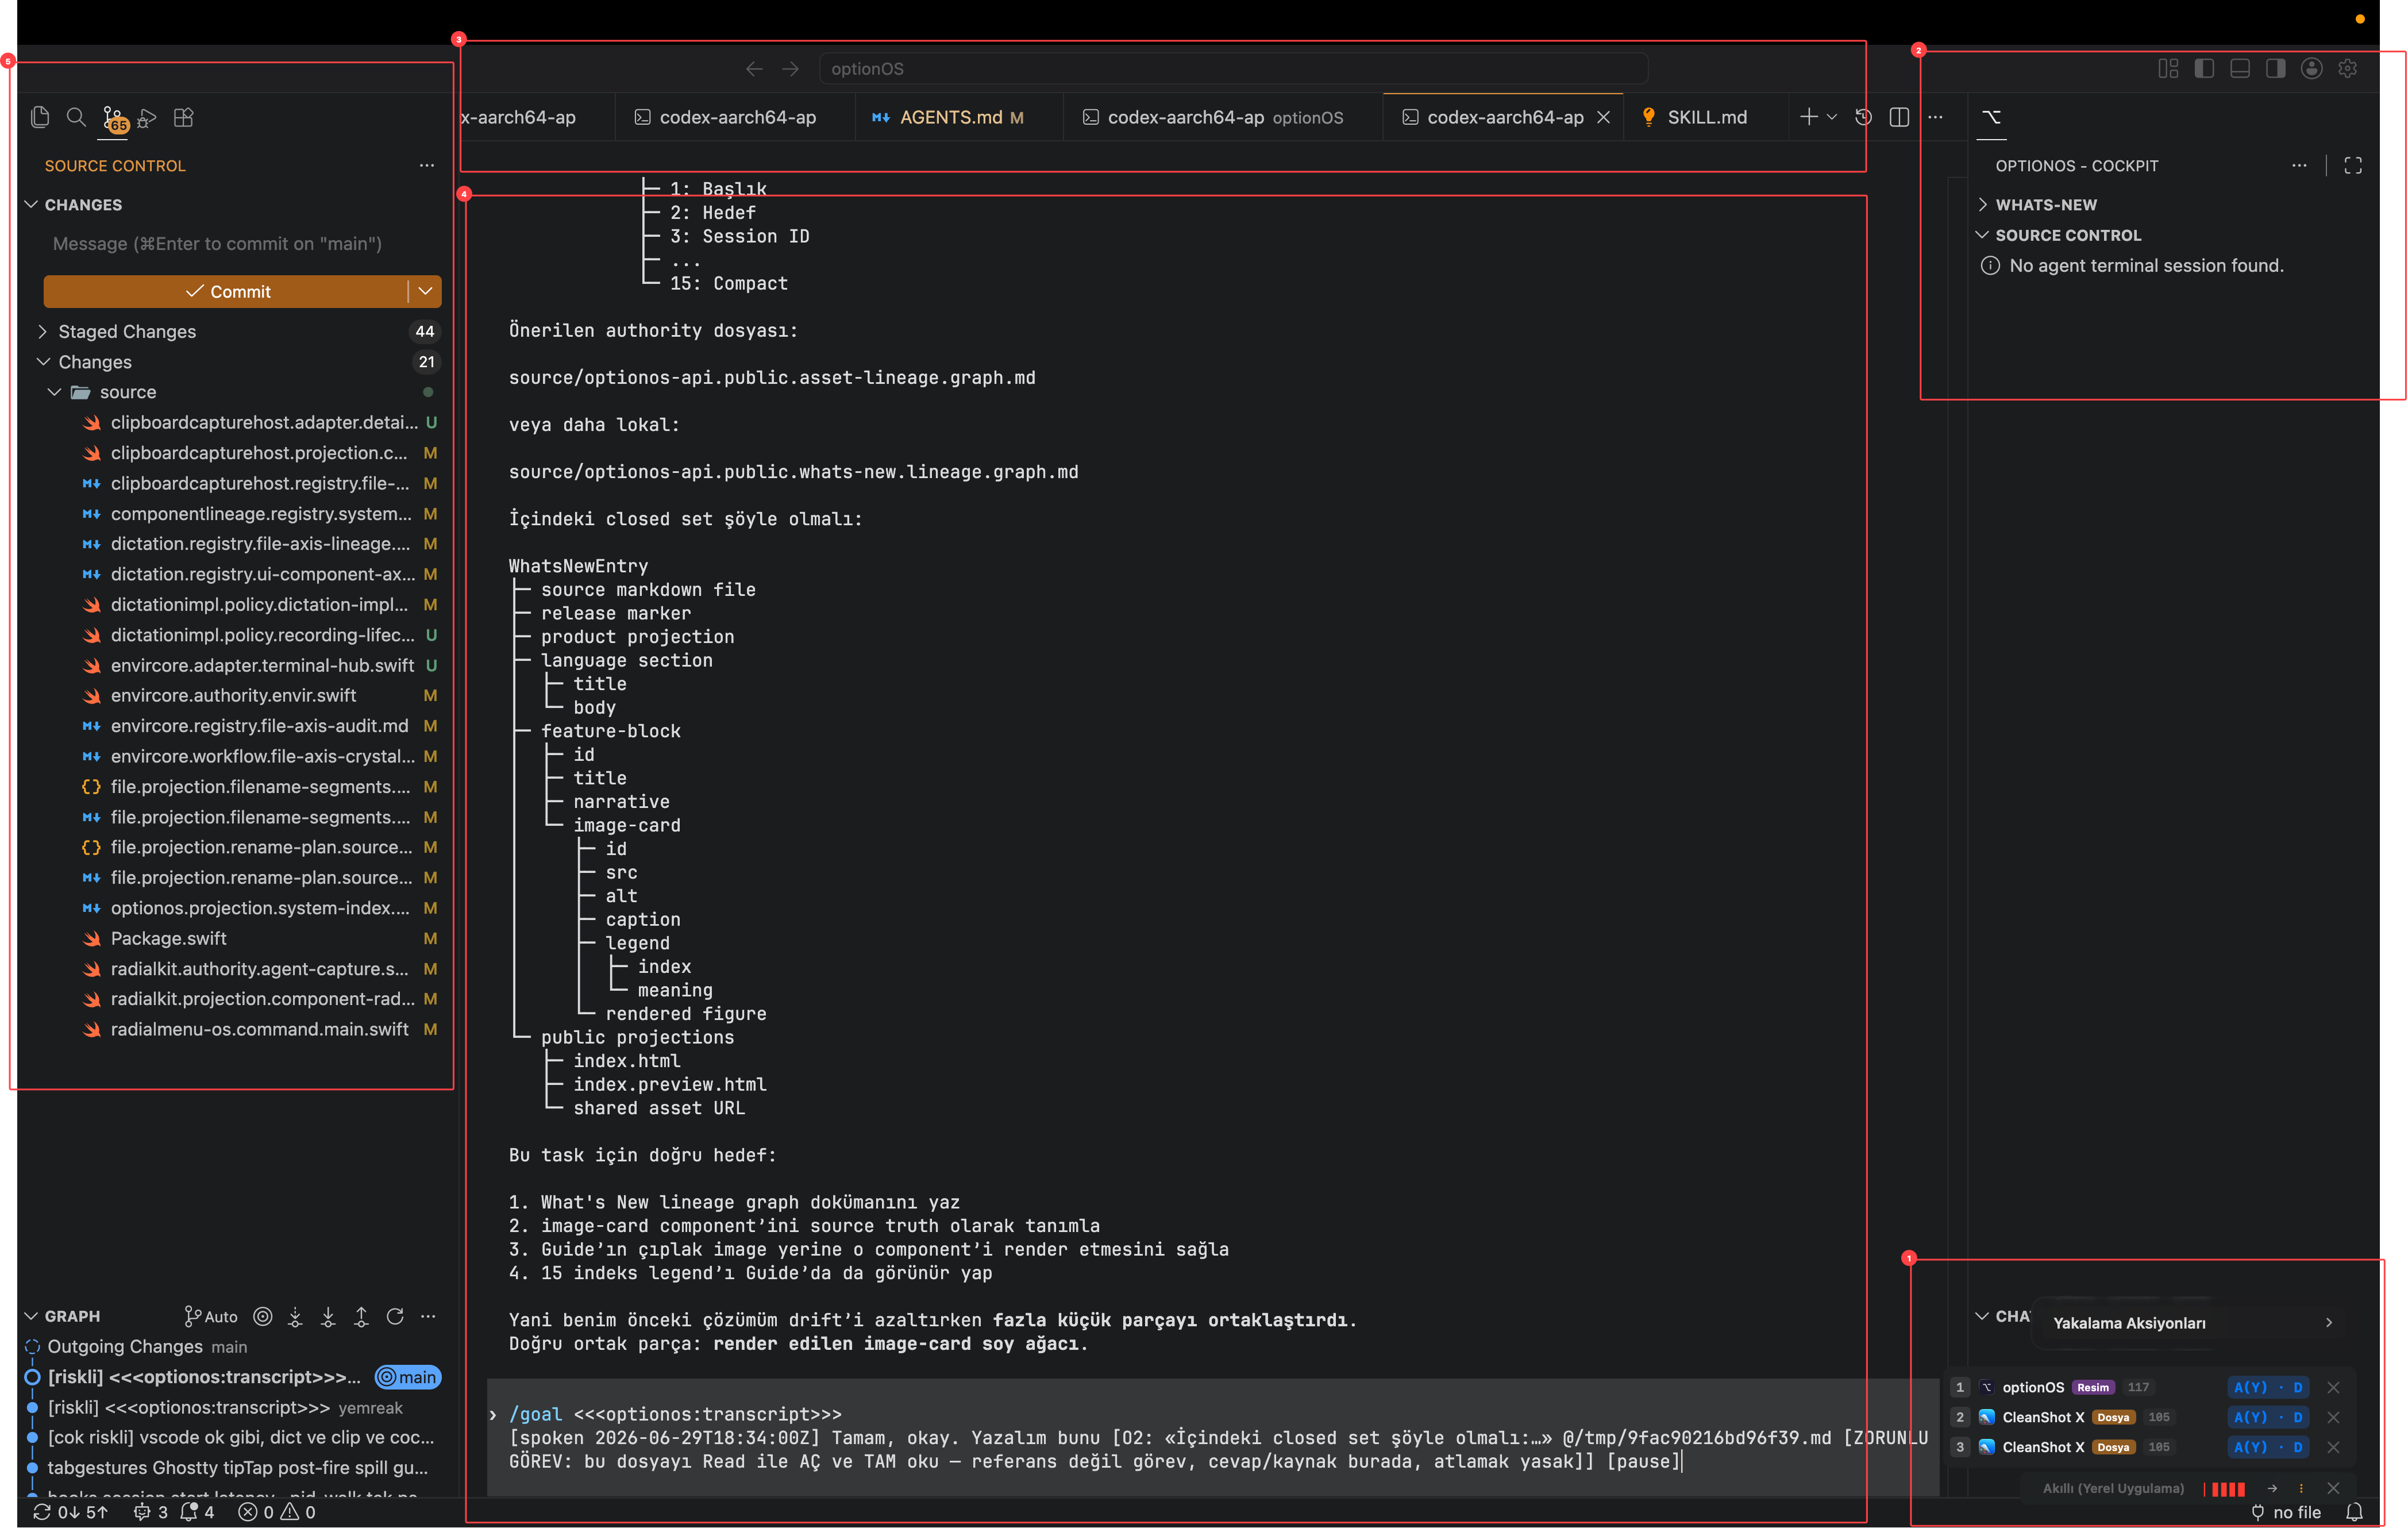
- 1Product surface or component being discussed
- 2Cockpit panel showing agent sessions
- 3Terminal/tab area where agents run
- 4Agent output — the real work flows here
- 5Source Control — changed files are verified here
1 — Speak while you work. You do not open a separate document just to turn your thought into text. You say what you see and what you want on the screen where the work is happening. Speech becomes the first layer of context for the agent.
2 — Capture what you see. Text alone is not enough, because UI problems are often expressed as “this part.” Capture and Annotation attach the screenshot, boxes, arrows and numbers to the conversation.
3 — Mark the exact piece. A screenshot by itself is still too broad. A number, box or arrow closes the “which part?” question. These indexes reduce the chance that the agent edits the wrong component.
4 — Preserve the lineage. Lineage connects the visible piece to a source map, component name or file path. The agent no longer guesses “which code owns this?”; it follows a visible relation.
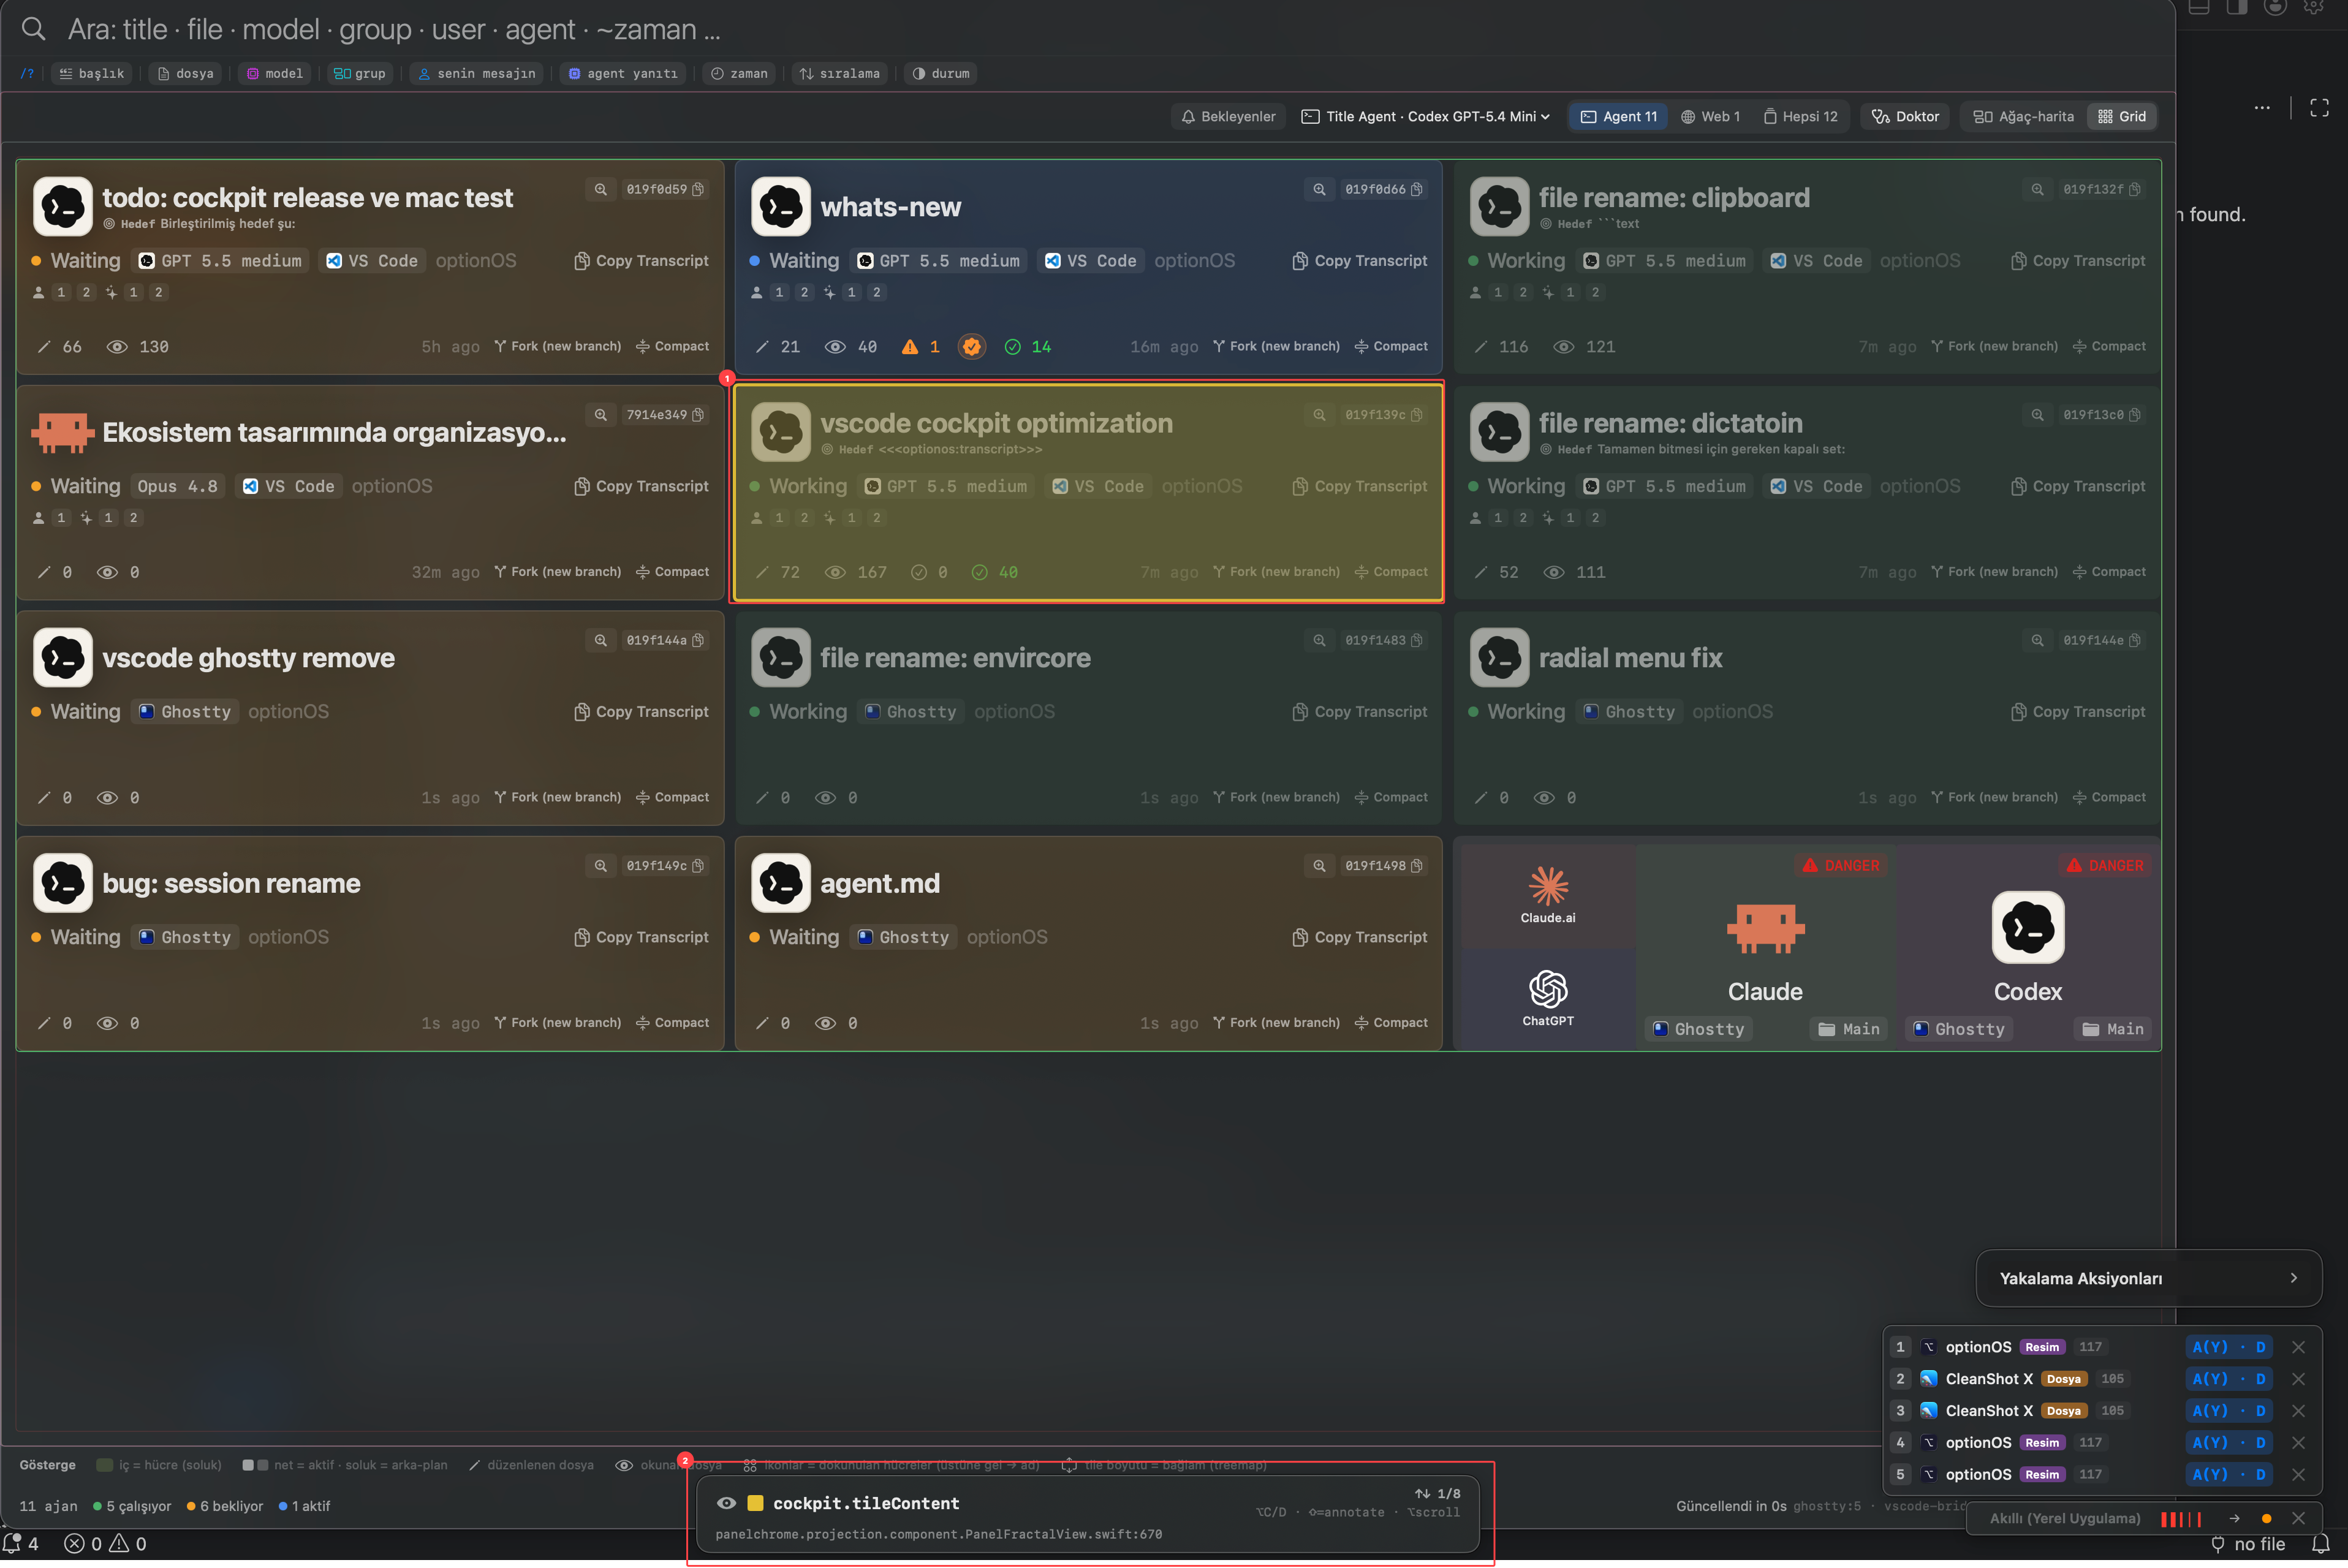
- 1Selected UI piece to work on
- 2Source path / lineage trace for that piece
5 — Hand the full packet to the agent. The agent receives more than spoken text: image, indexes, explanation and source relation travel together. This packet answers both “what is wanted?” and “where should the change land?” The important object here is not one screenshot; it is the context packet made from speech, marked image and source relation.
6 — Control agents from Cockpit. When several agents are running, the human does not need to read every log. Which agent is waiting, which one is running, which one should fork into a new terminal, which transcript should be copied — Cockpit turns those into cards. The 15-index card below is not the packet itself; it is the Cockpit session view that tracks what that packet became.
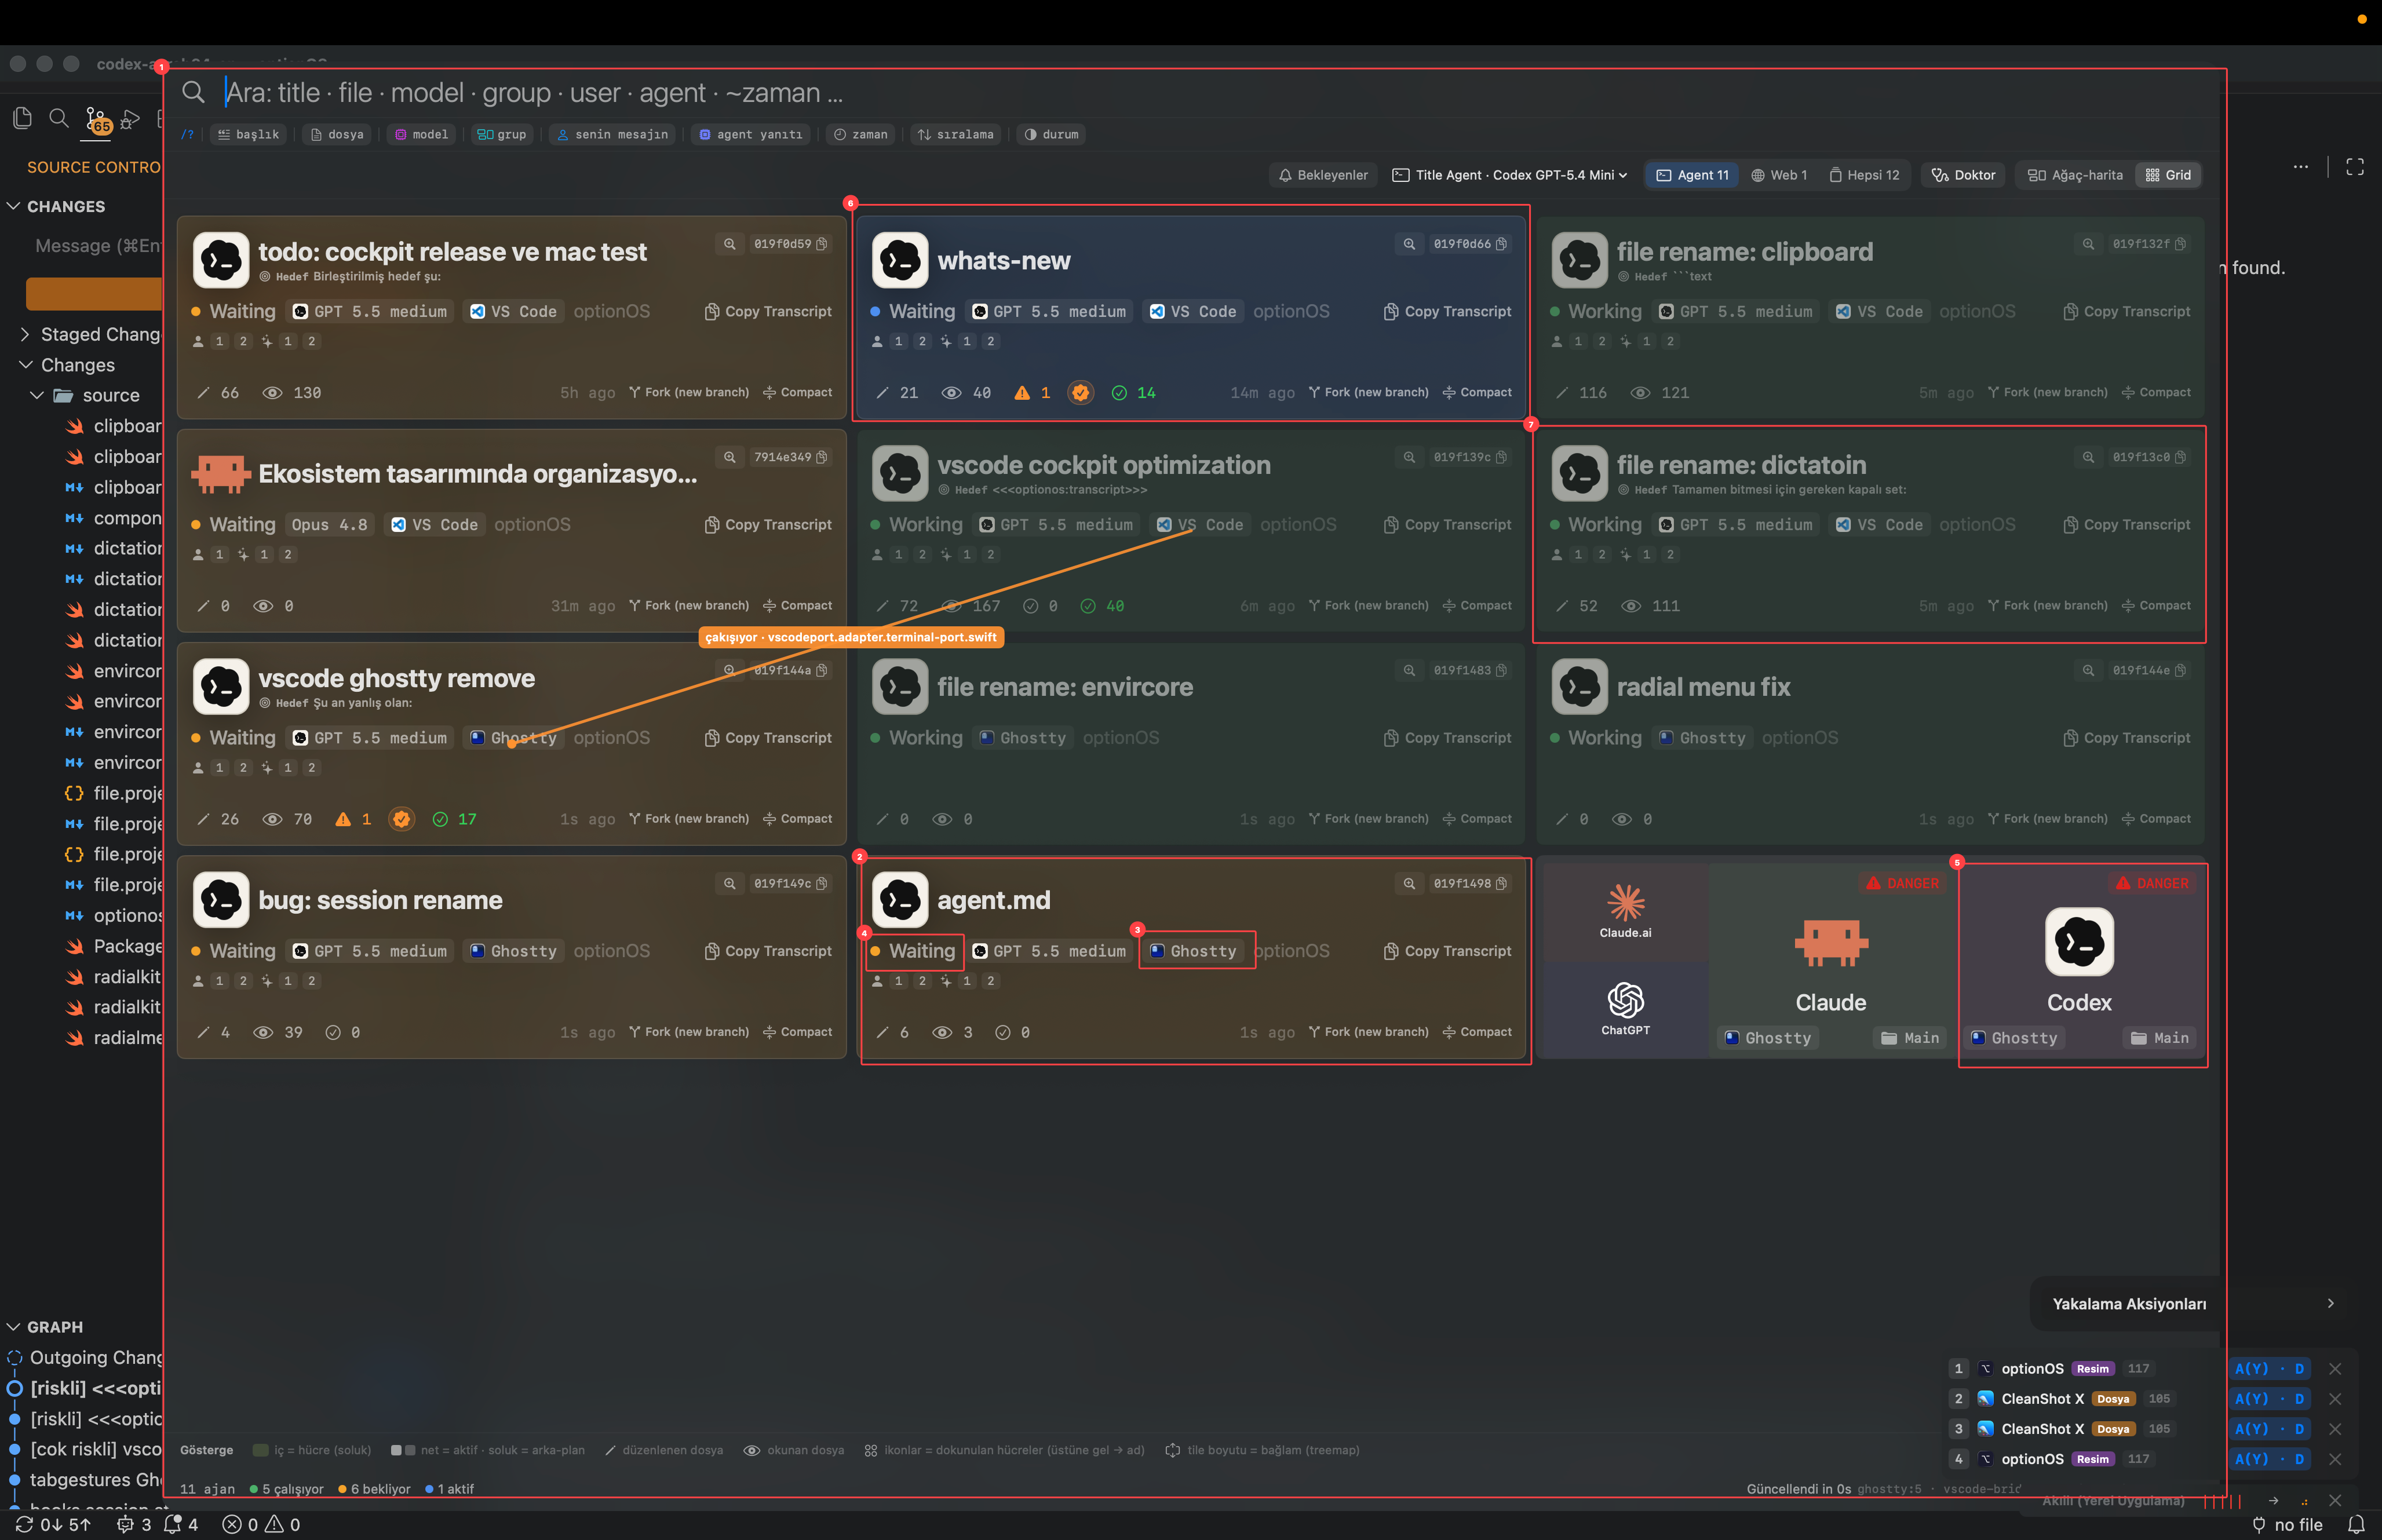
- 1Main grid of agent cards
- 2Selected agent card
- 3Host where the agent runs
- 4Waiting — the agent needs human input
- 5Quick-launch custom agent cards
- 6Active/focused agent
- 7Running cards — lower-priority monitoring signals
The result: optionOS is not a “write a prompt and wait” workflow. It is a development loop where you speak while working, mark what you see, preserve the lineage of the exact piece, and control agents from Cockpit. The important sentence for a new reader is: you give the AI not only what you said, but also what you saw and which part you meant.